
Winter’s chill is coming, and if you’re in Trion, Rocky Face, Sugar Valley, or Rising Fawn, now’s the time to get your home warm and cozy. Your furnace works hard to keep you comfortable, but it needs a little attention before the cold really sets in. Think of it like getting your car ready for a long road trip; a little prep goes a long way. We’ve put together some straightforward furnace winter preparation tips Trion Rocky Face Sugar Valley Rising Fawn homeowners can use to make sure their heating system is ready for the job.
Key Takeaways
- Schedule a professional check-up for your furnace before the cold hits.
- Regularly changing your air filter improves efficiency and air quality.
- Verify your thermostat is set correctly for consistent heating.
- Keep the area around your furnace clear of clutter.
- Test your furnace to confirm it’s working properly before you really need it.
1. Schedule Professional Furnace Inspection
Before the cold really sets in around Trion and Rocky Face, it’s a really good idea to get your furnace checked out by a pro. Think of it like a yearly check-up for your car, but for your home’s heating. These inspections are super important because they can catch small problems before they turn into big, expensive ones.
A technician will go through a whole checklist, but here are some of the main things they’ll look at:
- Checking for any gas leaks or carbon monoxide issues. This is the most important part, honestly.
- Making sure all the electrical connections are good and not worn out.
- Testing the thermostat to see if it’s working right and communicating with the furnace.
- Cleaning and adjusting the burners for a more efficient burn.
- Inspecting the heat exchanger for any cracks or damage, which can be dangerous.
Getting this done early means you’re less likely to have your furnace quit on you during the coldest part of winter. It’s a bit of an upfront cost, sure, but it usually saves you money and a lot of hassle down the line. Plus, you get peace of mind knowing your system is running safely and efficiently.
Don’t wait until you’re shivering in Sugar Valley or Rising Fawn to realize something’s wrong. Booking this service now is just smart planning. It helps your furnace run better, last longer, and keeps your family warm and safe all season long.
2. Change the Air Filter
Okay, so changing your furnace’s air filter might seem like a small thing, but it’s actually a pretty big deal for how well your system runs and how clean your air is. A dirty filter is like trying to breathe through a clogged straw – it makes your furnace work way harder than it needs to. This can lead to higher energy bills and even damage the system over time. Plus, nobody wants to breathe in all that dust and gunk, right?
Here’s the lowdown on why it matters and what to do:
- Improved Airflow: A clean filter lets air move freely. This means your furnace doesn’t have to strain, using less energy and heating your home more efficiently.
- Better Air Quality: Filters trap dust, pollen, pet dander, and other particles. Swapping it out regularly means you’re breathing cleaner air, which is especially good if anyone in your house has allergies or asthma.
- Extended Furnace Life: When the filter is clogged, the furnace has to pull harder, which can put stress on the motor and other parts. Keeping it clean helps prevent premature wear and tear.
When you go to change it, you’ll want to grab the right size. They’re usually printed on the side of the old filter. If you can’t find it, just measure the old one. Make sure you put the new one in with the airflow arrow pointing in the correct direction – usually towards the furnace itself. It’s a simple step, but it makes a real difference for your home’s comfort and your furnace’s health.
3. Check the Thermostat Settings
Your thermostat is the brain of your heating system, so making sure it’s set up right is a big deal before the cold really hits.
First off, confirm your thermostat is actually working correctly. A simple test is to turn the heat up a few degrees and see if the furnace kicks on. If it doesn’t, you might have a thermostat issue or a problem further down the line.
Here’s a quick rundown of what to check:
- Battery Check: If you have a battery-powered thermostat, swap out the old batteries for fresh ones. Low batteries can cause all sorts of weird behavior, from inaccurate readings to complete failure.
- Programming: If you have a programmable thermostat, take a moment to review your schedule. Make sure the times and temperatures align with your actual needs. You don’t want to be heating an empty house unnecessarily.
- Manual Override: Most thermostats allow you to temporarily override the program. This is handy for those unexpected chilly days before you’ve finalized your winter schedule.
It’s also a good idea to understand the different modes your thermostat offers, like ‘Heat’, ‘Off’, and ‘Fan Only’. Using these correctly can save you energy and keep your home comfortable.
Make sure the temperature setting is where you want it for the upcoming season. A small adjustment can make a difference in your comfort and your energy bill.
4. Inspect the Furnace Exterior
Don’t forget to give the outside of your furnace a good look-over. It’s easy to focus on the inside workings, but the exterior tells its own story.
Take a moment to check:
- The casing: Look for any dents, rust spots, or signs of damage. A compromised casing can let in dust and debris, which isn’t good for your system.
- Ventilation pipes: Make sure the exhaust vents and any fresh air intake pipes are clear of obstructions. Things like bird nests or overgrown plants can block airflow, making your furnace work harder and less safely.
- Electrical connections: While you shouldn’t mess with wiring, a quick visual check for any loose or damaged conduit is a good idea. If anything looks off, make a note for your technician.
Sometimes, a simple visual inspection can catch problems before they become big, expensive headaches. It’s like giving your furnace a quick once-over to make sure it’s not hiding any secrets.
This exterior check is a simple step, but it’s part of making sure your whole system is in good shape for the cold months ahead. It’s all about keeping that warm air flowing without any surprises.
5. Clean Around the Furnace
It might seem obvious, but keeping the area around your furnace clear is a really good idea. Think of it like giving your furnace some breathing room. You don’t want anything blocking the airflow to or from the unit.
Here’s a quick rundown of what to do:
- Clear away any stored items. This includes boxes, old paint cans, cleaning supplies, or anything else you might have stashed nearby. Flammable materials should definitely be kept away from the furnace.
- Remove dust and debris. Use a vacuum cleaner with a brush attachment or a soft broom to gently sweep up any dust bunnies or cobwebs that have accumulated on and around the furnace casing.
- Check for any leaks. While you’re there, take a peek at the pipes and connections. If you notice any water or unusual residue, it might be time to call in a professional for a plumbing check-up. You can find good help for annual plumbing maintenance.
Keeping this space tidy isn’t just about looks; it’s about safety and making sure your furnace can work efficiently all winter long. A cluttered area can restrict airflow, making your system work harder than it needs to, which can lead to higher energy bills and potential breakdowns.
Make sure to give your furnace plenty of space to operate safely and effectively. It’s a simple step that can make a big difference in how well your heating system performs when you need it most.
6. Test the Furnace Operation
After you’ve done some of the basic prep work, it’s a good idea to actually turn the furnace on and see if it’s working right. This is your chance to catch any problems before you really need the heat.
Here’s a simple way to test it:
- Go to your thermostat and turn the temperature setting up a few degrees higher than the current room temperature. This tells the furnace to kick on.
- Listen for the furnace to start. You should hear the fan come on and then the burners ignite. It might take a minute or two.
- Feel the air coming from your vents. It should be warm, not cold.
- Let it run for about 10-15 minutes. Check if the heat stays consistent.
If you notice any strange noises, smells, or if the air isn’t getting warm, it’s a clear sign something isn’t right. Don’t ignore these signals. It might be time to call in a pro to take a closer look at the internal workings.
Sometimes, the furnace might turn on but then shut off quickly. This could be a sign of a few different issues, like a dirty filter (which you should have already checked!) or a problem with the safety controls. Just running it for a bit helps you see if it can maintain heat.
7. Check the Blower Motor
The blower motor is basically the heart of your furnace, pushing that warm air through your ducts and into your home. If it’s not working right, you’re not getting heat, plain and simple. It’s a good idea to give it a listen when your furnace kicks on.
Here’s what you can do:
- Listen for unusual noises: Grinding, squealing, or rattling sounds can point to worn-out bearings or a motor that’s struggling. These aren’t noises you want to ignore.
- Check for proper airflow: Feel the air coming out of your vents. Is it weak? Is it non-existent? This could mean the blower motor isn’t spinning as fast as it should, or not at all.
- Inspect the blower wheel: Sometimes, dust and debris can build up on the blower wheel, making it unbalanced and less efficient. If you can safely access it, a quick visual check might tell you something.
If you notice any of these issues, it’s probably time to call in a professional. They have the tools and know-how to properly diagnose and fix blower motor problems, which can sometimes involve replacing parts or the entire motor. Getting this sorted before the cold really hits is key to staying comfortable, much like making sure your home is properly insulated, which you can see at 2939 Ronstadt Dr.
Don’t forget that a dirty air filter can also strain your blower motor, making it work harder than it needs to. So, keeping that filter clean is a win-win for both your air quality and your furnace’s components.
8. Inspect the Heat Exchanger
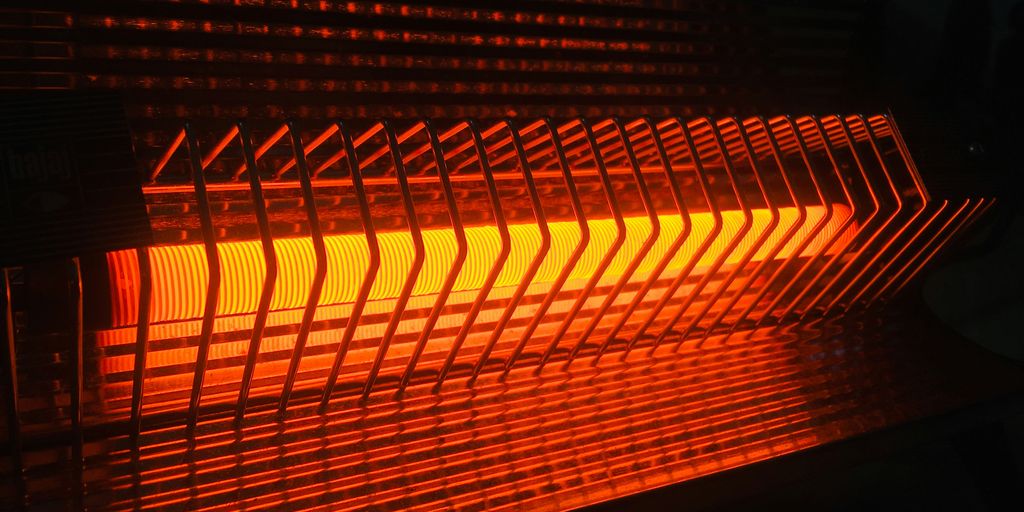
This part of your furnace is pretty important, and it’s where the heat from the combustion process gets transferred to the air that circulates through your house. It’s vital to make sure it’s in good shape before the cold weather really hits.
When you’re checking it out, you’re looking for any signs of damage, like cracks or rust. A damaged heat exchanger can be a hazard. Look for unusual odors, such as a chemical or burning smell, which might indicate exhaust gas leaks. A yellow or flickering flame is another warning sign. If you notice any of these, it’s time to call a professional right away.
Here’s what to keep an eye out for:
- Cracks or holes in the metal.
- Signs of corrosion or rust buildup.
- Any soot or debris that seems out of place.
A compromised heat exchanger means your furnace might not be heating your home efficiently, and worse, it could be letting dangerous gases into your living space. It’s not something to mess around with.
If you’re not comfortable inspecting this yourself, or if you find anything concerning, it’s always best to get a qualified technician to take a look. They have the tools and knowledge to properly assess its condition and make any necessary repairs. You can find local pros who can help with furnace maintenance in your area.
9. Clean the Burners
Dirty burners can really mess with how your furnace works. If you notice uneven flames or a yellow flame instead of a nice blue one, it’s probably time to clean them. This is something you can often do yourself, but if you’re not comfortable, a pro can handle it.
Here’s a basic rundown of how to approach it:
- Turn off the gas supply to the furnace. This is super important for safety. Make sure the power switch is also off.
- Carefully remove the burner assembly. You might need a screwdriver for this. Keep track of how it all comes apart so you can put it back together correctly.
- Use a soft brush or a vacuum with a brush attachment to gently clean away any dust, soot, or debris from the burners and the ports where the gas comes out.
- Reassemble the burner assembly and turn the gas and power back on. Then, test the furnace to see if it’s running better.
Sometimes, buildup on the burners can cause them to not light properly or burn inefficiently. A good cleaning can make a noticeable difference in performance and might even help save a bit on your heating bills. Just remember to be gentle; you don’t want to damage anything.
It’s a good idea to check your furnace manual for specific instructions related to your model. If you’re unsure about any step, it’s always best to call a qualified HVAC technician. They have the right tools and know-how to get the job done safely and effectively.
10. Check the Ignition System
Your furnace’s ignition system is what starts the whole heating process. It’s the spark that gets things going, so making sure it’s working right is pretty important before the cold really hits.
There are a couple of main types you might have: a pilot light or an electronic ignition. Pilot lights are those little flames that are always on, ready to light the main burner. Electronic ignitions are more modern and only come on when the thermostat calls for heat.
Here’s a quick rundown of what to look for:
- Pilot Light Check: If you have a pilot light, look to see if it’s lit. It should be a steady blue flame. If it’s yellow or flickering, or if it’s out completely, that’s a sign something’s not quite right. You might need to clean the pilot assembly or adjust the gas flow.
- Electronic Ignition Check: For electronic systems, you’ll usually hear a few clicks or a soft whirring sound when the furnace tries to start. If you don’t hear anything, or if you hear a ‘whoosh’ sound after a delay (which means gas built up before igniting), that’s a problem. This could point to issues with the igniter itself, the flame sensor, or the gas valve.
- Flame Sensor: This little guy tells the furnace if the burner has actually lit. If it’s dirty or faulty, it might shut the furnace down even if the burner is on. Cleaning it gently with fine-grit sandpaper can sometimes fix this.
A faulty ignition system can leave you in the cold, so it’s worth paying attention to. If you’re not comfortable poking around your furnace, or if you see any signs of trouble, it’s always best to call in a professional. They have the tools and know-how to diagnose and fix these issues safely.
Let’s look at the ignition system next. This part helps start your furnace. If it’s not working right, your furnace won’t turn on. For more detailed help with your heating system, visit our website.
Get Your Furnace Ready!
So, we’ve gone over a few things to get your heating system in shape for the cold months ahead. Taking these steps now can really save you some trouble later. Nobody wants a broken furnace when it’s freezing outside, right? A little bit of upkeep can make a big difference in keeping your home warm and comfortable. If you’re not comfortable doing any of this yourself, don’t hesitate to call a local pro. They know their stuff and can get your furnace running right. Stay warm out there!
Frequently Asked Questions
Why is it important to get my furnace checked before winter?
Think of it like getting your car serviced before a long road trip. A professional check-up helps make sure your furnace is running safely and efficiently, preventing unexpected breakdowns when you need it most. It’s all about staying warm and avoiding costly repairs down the line.
How often should I change my furnace filter?
It’s a good idea to swap out your furnace filter every 1 to 3 months. If you have pets or allergies, you might need to do it even more often. A clean filter lets your furnace breathe easier, improving air quality and making your system work less.
What should I look for when checking the furnace exterior?
Just give the outside of your furnace a quick look. Make sure there’s nothing blocking the vents, like boxes or furniture. You also want to check that the access panels are securely closed. It’s a simple step that ensures good airflow and safety.
Can I clean my furnace myself?
Yes, you can do some basic cleaning, like changing the filter and clearing the area around the furnace. However, tasks like cleaning the burners or inspecting the heat exchanger are best left to a trained professional. They have the right tools and knowledge to do it safely.
What’s the deal with the thermostat settings?
Your thermostat is like the brain of your heating system. Make sure it’s set to ‘heat’ and the temperature is where you want it. Some newer thermostats can be programmed to save energy by lowering the heat when you’re asleep or away. It’s worth checking those settings to stay comfortable and save money.
What if my furnace isn’t turning on?
First, double-check your thermostat to ensure it’s set correctly. Also, look for a tripped circuit breaker that might have shut off the power. If those simple checks don’t solve the problem, it’s time to call in a professional. They can figure out if it’s a bigger issue with the ignition or the blower motor.